Everything is included in the kit, but you will need some glue for some bits.
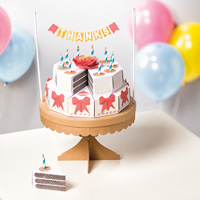
This is the picture in the catalogue

I started by opening the kit and spreading it out on my desk

It arrives in a bag that reseals, so you can do bits then put it back in the bag to return to again when you have more time.

Opening the back there are the 20 boxes, flat, 10 in each of the 2 sizes Everything is packed in sealed bags into the cake stand.

The stand comes in two parts which slot together. It can be used either way up and is quite substantial.

 The boxes have the double sided tape already in the appropriate place.
Then I opened the decoration for the boxes. The glitter parts are for the candles, the blue straws are all ready for the candles too.

I started by making the banner. The white letters are self adhesive. The banner parts are pre cut so you just press them out and then fold them over the white bakers twine. So easy and fuss free.

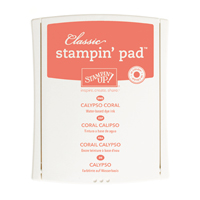
This is the stamp set that compliments the cake and boxes. At the class for this project I would supply the stamp set you just pay for the kit. You can purchase the stamp set if you wanted to but it is not included in the price of the class.

This is one of the stamps, I have stamped it on the icing frill for the back of the smaller boxes. I also went around these pieces with the dauber to 'pink' them up a bit more.

One complete box. This shows off the icing at the back of the box. I have daubed the top of the box around the edges too.
I have also stamped the cake on the inside edges of the box. You do this before you stick the boxes together.


This is a picture of the first 5 cake boxes, stamped and assembled and sat on the stand. I have some way to go to finish it. I will post a picture of it complete sometime tomorrow.
Class details in the planning.
Stampin᾿ Up! Supplies


No comments:
Post a Comment