Pages

Thursday 31 March 2016

Heat Embossing - vintage style

I started this card in the same way as the yesterdays card, stamping in versa mark and heat embossing in clear powder. I do like the effect this gives - making the flower look as if it has been inked in a darker ink. 


I then filled the background roughly with the dots from timeless textures. I wanted to get away from the straight edge square so I distressed the edges, eventually removing some of the corners. I have daubed the edges and the doilies. The cotton ribbon holds the focal point with the sentiment and a few punched flowers with pearls.


Which do you prefer, yesterdays clean and simple or todays grungy/vintage design?

The events and classes page has been updated. Please check it out. Thanks

Wednesday 30 March 2016

Heat Embossing

For those of you who read my blog who are crafty when did you last do any heat embossing?           Its one of those techniques that we all love, the wow factor as it happens in front of your eyes but it does seem to go in phases, lots of it about then nothing for long periods of time.
My little group of ladies who come to class on the second Wednesday of the month asked for heat embossing at their next class. So this week is heat embossing week. I have 5 different ideas for you. We will make 4 in class. I have one space left for the afternoon class on the 13th and 4 places for the evening class the same day. Contact me if you would like to come.

This first card is simple. The definitely dahlia is stamped with versa mark onto Wisteria Wonder card stock, sparkled with clear embossing powder then fussy cut.  The sentiment is stamped in Elegant Eggplant. The Wisteria Wonder seam binding ties a lovely bow. Simple clean and pretty


This shows the detail of the heat embossing.


The flower is attached to very vanilla then layered onto a Wisteria Wonder card base. 
Inside I have added a layer of very vanilla stamped with Wisteria Wonder ink across one corner. I have also added a stamped corner to the envelope. 


Tuesday 29 March 2016

A large decorated Peg

A quick post today, the washer needs to go on and I need to bake. There is something about a long weekend away, had a lovely time but its good to be home.
The peg found its way into my shopping basket a few weeks ago and I have quite a few plans for it. I will bring you more of the plans at the end of the week.
This is just a glimpse of a work in progress, using the botanical gardens suite.


More to come on another day.


Monday 28 March 2016

A puzzle

Here are 3 small pictures, sneak peaks of the coming Stamp a Sack.
At this moment in time I am on the motorway speeding home after a brilliant weekend away with my eldest son his girlfriend and her family. 
Oxford is a beautiful city and I have been inspired. 

This is just a quick post to keep you in the loop. Can you work out which stamp sets or DSP we are going to be using?


Sunday 27 March 2016

Same stamps, same technique, very different results.

Two things came together for this card -  I had wanted to create the dandelion picture with 2 of the very small stamps in 'Balloon Celebration' set and on Wednesday 13th April I have been asked to do heat embossing for my regular 2nd Wed of the month club.
I haven't done any heat embossing for while. The problem with this technique for a complicated multi-stamped image is when you stamp with the versa mark, if its clean you can't always see where you have stamped, plus you need to work quickly so it doesn't dry before you put the embossing powder on. This second problem was my concern as I had quite a few bits to stamp.
This first card is quite gentle, I have used white heat embossing powder then just swooshed the pear pizzaz and soft sky ink pads across the card to put the colour on and I think the sentiment matches the image so well.


The detail.


In order to do a card where the heat embossing pops I have created the same image on a dark background, here on Night of Navy. The white embossing does pop. Then reversed the colours for the sentiment. It certainly pops.


Which one do you prefer?


Saturday 26 March 2016

I've found them!!!

Last Tuesday I showed you two cards that I had enjoyed making but couldn't quite complete as I couldn't find the easels, well I have and now they look great.


When I found the easels I also found these, not sure why I bought them, any ideas gratefully received.


Friday 25 March 2016

Sneek peak - next workshop - Stamp a sack


Today is only a Sneak Peak. More details of the cards will come next week.

Saturday April 9th, Booth Cricket Club, HX2 6TW 2.00 - 4.30 £20

We will stamp a sack full of cards and their envelopes. You also get to decorate the sack if you have time! 12 cards in 6 designs in 2 1/2 hours, not bad going.
For this Stamp a Sack we have kept in mind people who are new or not experienced stampers. So half of the cards are very simple stamping that have a stunning impact. Looking for a new hobby, this is for you. Just want an afternoon out eating cake, chatting in a friendly atmosphere this is for you too.


Thursday 24 March 2016

George, a blast from the past.

I made this some time ago, well 2013 to be accurate. It is my sampler for my baby frames. I haven't made any for a while but I know I have friends with friends who are about to add to their families. Sets of baby stamps come and go but in general they have the pram, the booties, and the teddy bear. The set used for this frame is no longer in the catalogue, nor are the letters and numbers but there is a really good range there that could be used.


I would love to make a few more of these, you choose the colour and if you want a theme, have a theme.
I had an order for one who wanted lots of monkeys hanging and climbing over the letters. We were going away for the weekend so I spent 3 hours on the train cutting monkeys out, I did get some funny looks from the business men with their briefcases who sat at our table! The customer loved it.
Have a good long weekend.

Wednesday 23 March 2016

Last Call Tempting Turquosie

Today is the last day I can order in time for class. This is my tempting turquoise class using the Grateful Bunch stamp set and punch. I have had lots of lovely comments about these cards. There are a couple of places left in both classes, afternoon and evening. So if you are remotely close to Halifax get in touch, details on the classes page. If you are not local then this set is available as 'Parcel in the Post'. you will get the stamp set and punch and everything you need to make these 5 cards, you supply the ink and the adhesive. See tab above for more details.


Tuesday 22 March 2016

In my comfort zone

Today I bring you something that is really my thing. I spent a lovely couple of hours yesterday creating these then another couple of hours looking for the bag of mini easels I bought yonks ago knowing they would be useful! But I can't find them. Still here are the makes----


They should be attached to those little easels, I will find them, just when I'm not looking for them or when I have been and bought another packet! Does that happen to you?

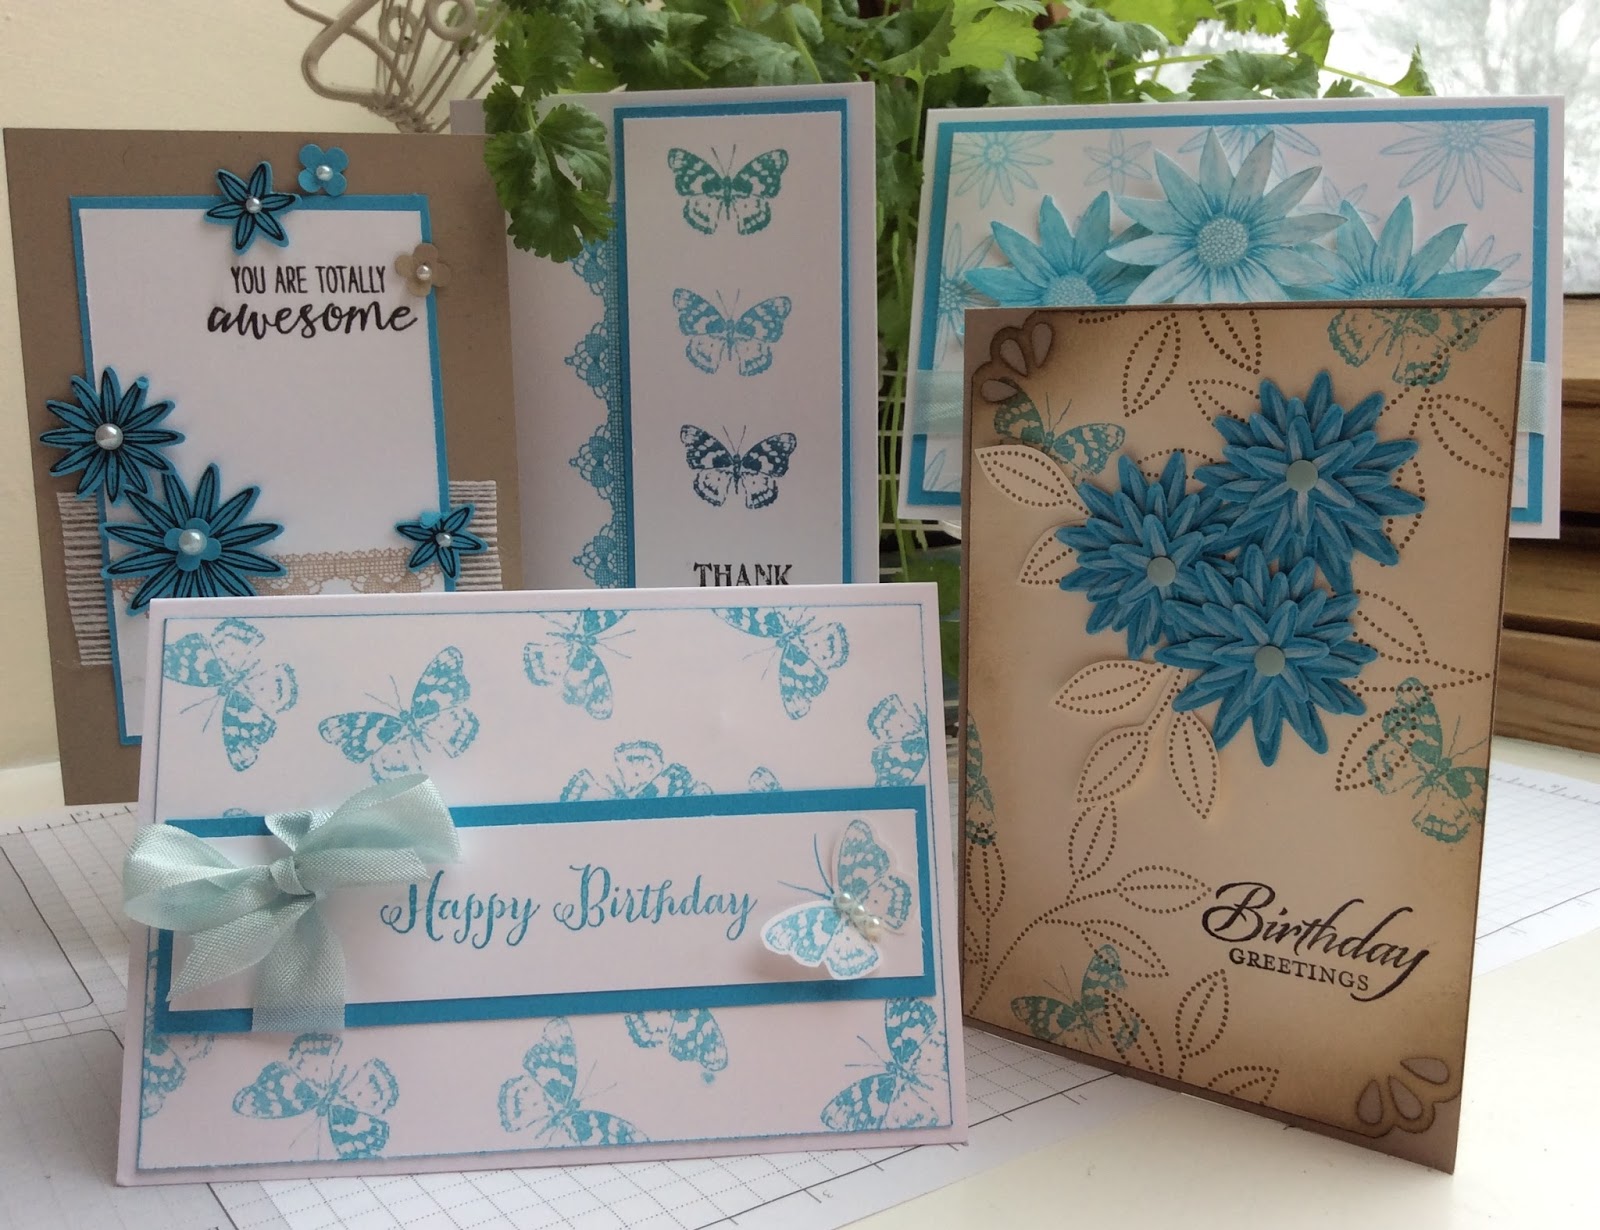
I had a good rummage through my box of dies, these two sets have been well used but generally as one layer on other projects. I thought it would be fun to create something with all the layers. This first one the Lots of Labels frame lets uses 4 of the 7 dies. I haven't used the 2 smallest ones although I could have put letters on them and used like bunting, thats for another day.

I have used the lovely corrugated paper for the base layer - really like this. All layers have been stamped and daubed and a number of elements from different stamp sets used too.
Colours used are Memento black, soft suede, crumb cake and cajun craze. I have added a little of the gold wink of stella here and there to add a touch of sparkle.
I still have plenty of gold thread left from Christmas and the pearls for the butterfly bodies adds a bit of femininity.


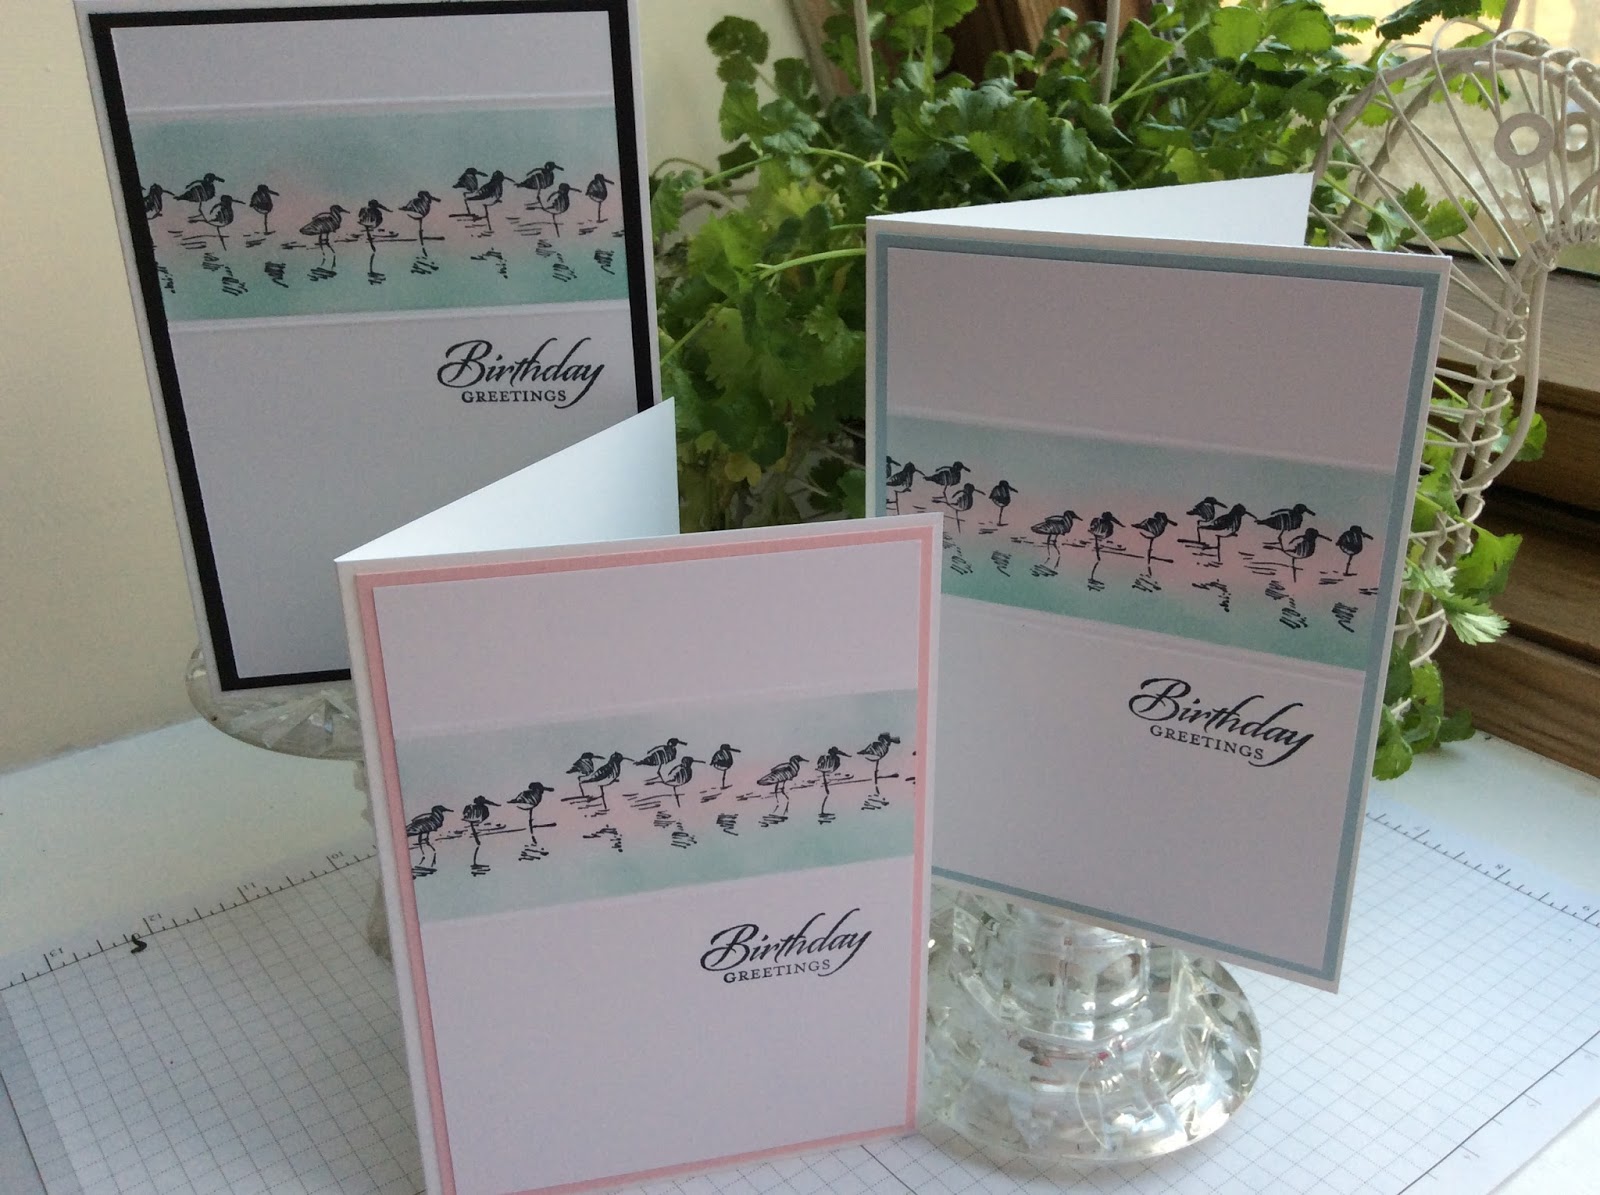
The second one is cut using the deco labels. There are only 4 in this pack. I didn't use the smallest one.
It has been put together in the same way, stamping, daubing and the same colours just different stamp sets and a little fussy cutting for the little bird. I have added loops of the gold metallic thread for a little sparkle and again the gold wink of stella pen.


I could use them as card fronts. I will have to try that out but they would look good on their easels.


And finally that ongoing project looks a bit different. 3 emery boards later, I use them for rubbing down small pieces like this its easier than proper sandpaper. I think the whole thing has been gold at some point in time, whether thats its original colour or not I'm not sure. I am going to leave the legs and base gold for now but might change my mind later


Under the layers of paint on the drawers I have found this detailing showing up. I won't be able to restore it but it is intriguing.


Monday 21 March 2016

Only 10 days to the end of Sale A Bration

Well folks, I hope you have had a lovely weekend - the first weekend of spring. I just hope the weather continues to improve. The lambs are here but it has been too cold for them to be gambling about in the field. They do keep us entertained for a few weeks.


Being the 21st March means we are only 10 days away from the end of Sale A Bration at Stampin’Up. Have you got that free stamp set yet. This is the link to the Sale A Bration Brochure have a browse, it makes that qualifying order such good value for money.


More importantly there are only 10 days left to get the most amazing signing up deal. How many times have you wondered about starting your own business. You can do that with Stampin’Up with a layout of just £99. For your £99 you get
  1. £160 of product.
  2. The support of another demonstrator, so you are not alone when you are getting going.
  3. The opportunity to make it work for you - your choice of hours - your choice of how far you take it - your choice of keeping it a hobby or conquering the market!
  4. 20% discount of all your own personal purchases.
  5. The quality of product that Stampin’Up is know for.

and most importantly
 being part of a team that enjoys  a supportive network of new found friends.

We have our regular conference next month in Telford. I always enjoy this event and feel so motivated afterwards. One of the activities that we are regularly encouraged to do is to write down why we joined tampin’Up or what is it about Stampin’Up that we love. Now I am not keen on this type of writing, soul searching/soul baring, its jet not me. But I thought I would share what I did write last time as I think it says it all about Stampin’Up for me.

I joined Stampin’Up because I didn’t want to get a proper job! I have always crafted and knew that I could happily fill the days making stuff. What I didn’t know was that it would bring me some really great new friendships. The ability to complete the stuff I made because of the colour co-ordination in card, ink, ribbon, buttons, designer paper which I always found the frustration thing before Stampin’Up. It has brought me a wider understanding of marketing which is actually quite interesting, a wider understanding of social media, because I wanted to grow my business I have had to get on that bandwagon! A recognition of the amazing talent that there is out there of which I am a part. It might not be a proper job but I am part of something that brings happiness to so many. Now that can’t be a bad thing.

Hope that isn’t too slushy. Think about it but only for 9 days, sign up on the 10th day - 31st March, you won’t regret it.

Need more information message me or pick up the phone.

Talking about projects - we had a bit of an amble around the local antiques centre yesterday I bought an embroidery hoop and this - watch out later in the week for this finished project!


Sunday 20 March 2016

The last of nostalgia week - Wetlands

I have a job for you my readers.

I started out to create a one layer card with the wetlands set but it didn't happen! I have created these with post it notes to limit the inked area which is daubed first with the pink across the middle then soft sky above and pool party below. The birds are stamped with momento. I have then used the score thing on my trimmer along the bottom and the top of the inked area.

I created one card then had doubts about the matt layer so I made another two with different colour matt layers. I would love to know which works best for you.

Here is the trio


The base card is the thick whisper white. My first make had the black as the matt layer but it looked a bit vibrant against the white so as I had used the pool party and the blushing bride inks for the daubing I decided to use these colours for matt layers. I am still undecided which colour looks best.


 Leave me a comment about which colour you think looks best. Thanks