Pages

Tuesday 30 June 2015

Choose Happiness


This stamp set has been on my shelf for a few months and never used, shame on me!


I started with the flower but then changed my mind as I did flowers yesterday. I wanted to  use some of the other stamps in the set there are six to choose from. This is my result. I have used three stamps from this set and two stamps from the Butterfly Basics stamp set. I have added a small piece of the new striped cotton ribbon in mossy meadow using the silver staples.


These two small pictures show some of the details. The thread is actually the jute ribbon which I have stretched over the scissors blade then peeled into fibres, when you peel them they naturally curl.


Monday 29 June 2015

Blended Bloom


Something for the ladies and pretty in pink.
This stamp comes as a wood mount only and in one of those small half size boxes. As its an outline stamp it is really meant for colouring in so out came the aqua painters. I find I loose track of time when I have an aqua painter in my hand, its so relaxing and therapeutic. I also promised myself a morning of butterflies but found that putting more with the flower looked overcrowded.


The butterflies are die cut from mat silver card that is no longer available and from the silver glimmer card. I have added a rhinestone for the head of the butterfly. The wings have been really easy to give a curl to which gives it a three dimensional effect.

 The back ground has been embossed with the new flutterby embossing folder then I have daubed over with the melon mambo pink very lightly just to highlight the butterflies.


Details of the flower centre done with the tiniest pearls.


and even closer detail!

The leaves have an added lines with the white gel pen then daubed with the Mossy Meadow to soften the white.  Staying with the silver theme I have added two lines of the narrow silver ribbon. My sentiment will go in the inside as I didn't feel there was room on the front.


Friday 26 June 2015

No Bones about it........ again

A few more for you. I said I liked this set.

 Love the Stegosaurus. I have used a piece of DSP from the Go Wild stack. These are 6" x 6" which is new for Stampin'Up. Although I am not really an animal print person I use a lot of the colours in this paper stack, i.e.: the neutrals so I don't think I will have much trouble using it up.

The stamped leafy panel was an excuse to use the 3 stamps that have either a single leaf or that long ferny stamp, looks a bit like pond weed but we won't go there! I have used Mossy Meadow (last years in colour) Garden Green and the new Cucumber crush, can you tell which is which?
Really pleased with how this one came out.

The second one uses the greens and the leaves again but it one of those layered cards. My OH was impressed with how that worked and asked how I had done it..... trade secret I said. I think this one is quite sweet, I have put the sentiment on the inside and added a few extra leaves, stamped not fussy cut which I did consider.


This third one I stamped the dinosaur in Elegant Eggplant then matted and layered onto Wisteria Wonder. The colours work together quite well.
As the stamps are photopolymer you can see through them which made it easy to stamp the words acres the middle. I then wound some linen thread around all the parts to give a little more interest.

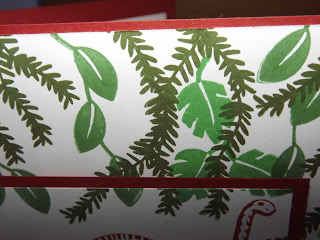


Some detail of the green.

Thursday 25 June 2015

No Bones about It

Yeah... the dinosaurs are back. Really love this stamp set, the greetings are good too.
Just how many little (and big) boys cards do you need in a year? These will fit the bill every time.

This first card was made by my team leader, Julie Kettlewell,  as her swap at our training day 2 weeks ago.


I have continued the theme, stamping the body of the dinosaur then heat embossing the bones in white. I have  used the tag punch for my greeting, with a little crumb cake seam binding.


A little detail with footprints and fussy cut leaves to two corners to give the whole design a bit of balance.  These are stamped in Hello Honey one of last years in colour that I haven't used much as its quite a strange shade of yellow,,,,, ideal for leaves.


Wednesday 24 June 2015

Swing Pop out Card No 3

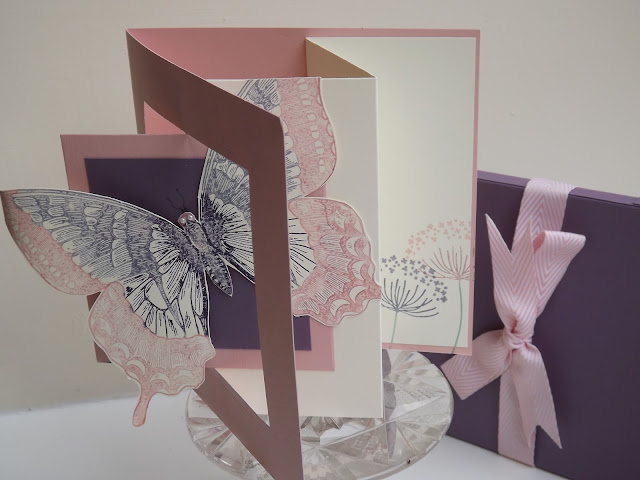
I couldn't resist another one. This time I have used Swallowtail and stamped inside the card with Summer Silhouettes. So delicate and pretty. For this card I have also made a box but more of a box envelope than a box with a lid. (I did do a box with a lid but as usual it was a disaster, much prefer this one!)


 Can you see the problem with the 3 small pictures.......? One of those pesky bits of backing from sticky tape has stuck by static to the front of the card. I have found them in all sorts of places what about you?
Here we go again without the sticky tape backing.


So pretty, would you like to join me and create a card like this. July 14th 2.00 - 4.30 or 7.00 - 9.30pm £6.00, only 6 places in each session. message me for your place.

Tuesday 23 June 2015

Swing pop out card or pop out swing card?


Loving this. This is the second one I have made but I did cheat a bit.
I did the stamping and assembly of the front on a piece of whisper white before I even got the pink card out.
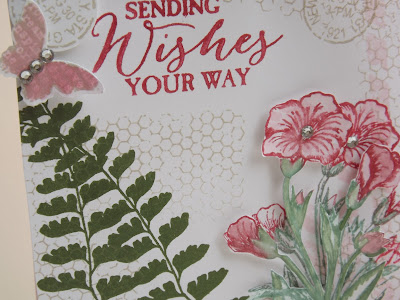
 I love all the different elements of the Butterfly Basics stamp set and here it is without the matching die cut butterflies. Plans for those for another day. The fern leaf is just lovely, here I have stamped it in Mossy Meadow one of last years in colour and I think a really luscious shade of green. I have used Sahara Sand for the background mesh element and the circular post mark element. The flower I have used the aqua painter with Blushing Bride and Watermelon Wonder...... what a glorious name for a colour and it is becoming a favourite.
The instructions for making this card style you can find here www.thecraftspa.blogspot.co.uk/2015/04/tabbed-pop-out-swing-card-or-square.html
they were written by another stamping up demonstrator and friend Amanda Bates, she is quite a paper engineer her blog the craft spa is certainly worth a regular visit.


Watch this space for the third make of this design its a stunner!

Monday 22 June 2015

No Bones about it

WOW what a set of stamps, and what a name for them. They would have been so useful when my boys were small. Here I have created a frame to decorate a small boys bedroom.


Details. I have stamped the bones with versa mark and white heat embossed.

On the stegosaurus I decided to use the spots rather than the bones, they got the same treatment.

The strange shadows are the trees out side my window.


What do you think?  Would you like to make your own? Contact me.

Friday 19 June 2015

Lovely as a Tree


This stamp set has been in the Stampin'Up catalogue for longer than every other stamp set. Mine is quite new and this is only its second outing. I promised to show you what we would be making in the 2nd Wednesday of the month class for July (the class is actually on a Tuesday next month due to other commitments!) Its a swing pop out card

 Gosh it is difficult to photograph to show you how impressive it looks.
I have used the markers in all the shades of green to colour the canopy part of the trees directly on the stamp and early expresso for the trunk part, then 'hufffffed'. It has stamped beautifully.
Using the aqua painters which I find very relaxing I have pulled the green and the brown to fill the tree. Then with the soft sky put a small wash around the whole design and finished off with a freehand stitched border in early expresso.
The oak tree has been stamped, coloured and fussy cut from a separate piece of card then put on with dimensionals.

The Happy Birthday sentiment is from the Butterfly Basics. There will be a few more of these to follow over the next few weeks.
I would love to read your comments on this make.

Thursday 18 June 2015

Bohemian cards

These four little cards are to fit into the little bag I shared with you yesterday.
These first two are really the stars of the show. I have used the Bohemian stamp set for these. As the stamps are photopolymer you can see through them which makes them easy to position next to each other without using the stamp-a-ma-jig, something I am not very skilled at using.
For the second two I have gone back to the designer paper.
I shall use the stamp set for some other creations soon.


July classes now posted on the events tab at the top of the page.

Wednesday 17 June 2015

The wonderful 'Hallet' bag

I love this little bag. I am planning on making at least 1/2 dozen. This will be my gift to the lovely ladies who book a party with me in June and July. The bag is a perfect size for 4 little cards and envelopes.

Again I have used the Bohemian papers and a matching card for the box base and handles. I want to design a way of adding the handles that doesn't use the brads. I'm not keen on them, they play havoc with my nails when I am opening the backs!


Tuesday 16 June 2015

Bohemian Designer Paper and the Bow Tie Punch


Inspiration from looking at lots of designs on pintrest. I love these designer papers but how to show them off to their best. Keeping the designs simple, no ribbon and using the colours in the papers as the card bases and decorations has a ensured the cards are clean and eye catching. They are suitable for male cards too, always a bonus.


July classes now posted in the events tab.